Development Projects – Log : 15/08/2019

SQL based database management system

Over the last two week or so I have been working on the following areas:

Training in the areas of (postgresql, Python with (tkinter and psycopy2) – python modules ) using UDEMY, I have become a massive fan of the UDEMY system as there is a mass of IT courses available in almost every possible subjects and I am currently registered on three courses that relate to all the above areas.

At the start of this week, I found myself in the position of being able to have a fully working SQL data table editor and the framework for a fully functioning GUI application completed as you can see from the images here.

During this period of my Database system project, I have been doing my best to crack some of the harder eggs, i.e. the areas of the project I had the biggest questions about and I feel that I have done well at defining these areas in the form of questions and then getting full answers for them, along with the needed skills.

These areas and related question are as follows: management

1.. The methods of connecting a python program to an SQL database, i.e. how do you link your python code to a Database Schema that you have created on a postgresQL server or any type of SQL server?

2.. The best way of using SQL statements within a python-3 program, in order to (create, update, read, write and delete ) row of data within an SQL table?

3.. How do I use the Python language to provide the best (GUI) user interface to the above SQL database and table connection?

4.. During any Python application development, how do I make sure that I code with a relational database model in mind?

Clearly, there are many other questions that have come up but the above questions are the key ones!

Questions 1 and 2

For questions 1 and 2, the answers relate to the python psycopg2 module, this module includes functions that both provide methods for making the TCPIP port connection to a network-enabled SQL server, it also provides all the needed SQL API calls to this server once the connection has been made.

DVDrental database

As a side note here, the website Postgresql Tutorials includes a sample database ‘Dvd-rental’, clearly based on the kind of SQL database that a DVD rental company would have used for its daily operations.

I have downloaded this and restored it to my PostresQL server, I will use this database for this project as it has a great model for a relational database system. I have two posts in mind over the next week one relating to the setup of a PostgresQL server and another one on the definition of a Relational database management system (DBMS).

Below is the Graphic of this Dvd-Rental SQL database.

As you can see there are many relationships between tables here, you simply follow the connection lines between tables to see the connections between them.

Personally, I think that there may be one too many tables, i.e. using a table to store all the addresses within the system and giving these addresses an index ID is a bit on the heavy side! It does match the concepts behind a relational database (no repeated data in any location!) but adds another issue, these being the ease at which these addresses can be found later! i.e. when you allocate a new (customer, store or staff member) an address you would have to enter it into the system in such a way that it is allocated an ID number and then stored into a separate table. I can get this for the store table but not for the staff table, finding an address id or adding a new one for each staff member address could turn out to be a pain, to be honest, you need a search routine to locate a matching existing address and the likely hood that a staff members home address will be duplicated that often is not high!

Space-saving of storage is one possible reason, this is most likely the reason its included, however, I think to act as a strong test to a programmer who is developing an application to work with this sample database is more likely!

Actually, that’s a great reason so I will run with it!

Question 3

Moving on to the best method of coding python using a GUI system, the python module Tkinter is one of the most widely used Python modules to present the user with a modern GUI system. It includes all the lastest GUI features, such as (menus, frames, labels, entry fields, drop-down selection boxes, scroll bars and buttons + much more).

So I have been training myself via two UDEMY courses, to use these modules features. You can see some of the results so far in the images above, I feel that I have a full grip now of how to produce a modern GUI application using Python.

Question 4

This question related to coding an application so that any data (created, entered, updated or deleted) fits the philosophy of a fully relational database.

The answer to this related to using the (Tkinter(python2)/tkinter(python3)) module to its best effect, i.e. when your entering or changing data in a relational system your not dealing with a single data table but with all the data that relates to the primary table that you are processing.

If you are editing the Staff table you also have to open links to other tables that are related such as (store table and the address table). So you need to have all these tables open and presented to the user screen during the editing process. Just showing the ID’s of the store and the address data will not be enough!

In data-base applications such as MS-access or Libreoffice-base this requirment is handled by including a sub-form in the main form, showing the data taken from the related sub-tables, in the relationship.

When coding in Python clearly this is handled by opening and displaying all the related tables and columns and then following any changes made, updating any rows that need to be updated in the primary tables with – ID codes for example.

Clearly, some of the applications modules will only need to edit and update a single table, such as when you enter all the details for each city in the system above, yet other editing and data enter modules may be capable of adding data into more that one table at a time, this is not advisable however for more than one reason.

…..

So that’s my updates for this post, I feel the project is going very well 🙂

As a footnote, I have also been using applications such as MS-Access and Libreoffice-base in conjunction with Python code to help me when I want to check my logic along with when I need to view/enter any test data for the python code.

I will post on how these applications fit within an SQL server environment as both can be used with local none SQL-server based tables. I will also post on the structures I have created for queries and forms as this will help me to get a full grasp of the relationships between all tables.

I have also look in-depth at an application called Kexi and I like it a great deal as it offers a great yet simple designed interface but it has one basic problem, it cannot use SQL tables that have been created outside of itself (e.g. in Pgadmin 3/4 ), you can use the tables created with it, in Python or application such as (Access etc..) but not the other way around, so I will not use it in this project, as clearly the DVD-rental database cannot be opened in Kexi – so that’s the end of that – for the moment!

PS… I am using Chrome these days with the Grammarly plugin for WordPress posts, I do my best to proof read these post but I am not an author writing a book, so I just hope as well as my spelling and grammar, my written logic here working for you !!! 🙂

Advertisement
Posted in DBMS, Development Languages, IT skills, Programming skills, Python, SQL, Uncategorized | Tagged , , , , , , , , , , , | Leave a comment

Do you trust this computer ? – A Documentary – AI ?

Today I just wanted to share the below video “Do you trust this computer ?”, Its a 2018 American documentary film that outlines the benefits and especialuslessly the dangers of artificial intelligence.

It features interviews with a range of prominent individuals relevant to AI, such as Ray Kurzweil, Elon Musk and Jonathan Nolan. The film was directed by Chris Paine, known for Who Killed the Electric Car? (2006) and, the subsequent followup, i.e., Revenge of the Electric Car (2011).

Topics covered range from military drones to AI-powered “fake news” feeds. At one point while being interviewed, Musk warns that any human dictator will eventually die, but that a digital superintelligence could someday become an “immortal dictator from which we can never escape”. Musk also sponsored free streaming of the film on Vimeo during the weekend of April 7, 2018.

The film was featured at the 2018 Napa Film Festival.

The documentary is also dedicated to Stephen Hawking, who warned that humanity may be jeopardized by its pursuit of a superintelligent artificial intelligence.

Robot before grime city

My own thoughts on AI are a little less dramatic than the somewhat Hollywood like opinions expressed above!

Firstly, during this documentary they talk about AI in the Arms and Security industries, you have to remember that technology of all kinds has been used in the creation of weapons going back thousands of years, from the Chinese fireworks type rockets to the Romans using massive crossbows.

Clearly however adding a fully functioning AI system into robotics and then using these systems as weapons, out in the field is a massive step forward (or backwards?), again however the real world is not the world that Hollywood has created in our minds over the last few years. The Moviemakers would have us believe that these machines are only waiting for the moment to come when they are ready to wipe-out humanity!

We are not living in the world of Terminator (1,2 and 3) or I-Robot and we need somehow to detach ourselves from these imagined events and storylines!

Secondly, I still feel that the idea that Robots is AI software are going to replace every job on the planet is pure fantasy!

Last year at some point SKY news in the UK had a 10-minute article on IA systems and their effects on our working life, during this article that had a robot employed by Amazon_uk doing it very best to deliver a package to a customer. Its looked very much like an automated lawnmower but with the customer’s package attached on its top, it very slowly made its way to the customers address using its GPS module!.

Its main problem was that the customer lived in a three-story apartment and about 50 actual addresses were located under the same physical roof and GPS location, needless to say, the package was not delivered!

Remember Computer systems have been talked about since the 1940s in these negative terms ……

One of my most loved Movies is “Sky Captain and the world of tomorrow”, its set in the 1940 Era and its full of the same reflections and fears, that Robots will be used to take over the world on behalf of a small pocket of evil dictators!

This is pure fantasy! and now that computer systems are here to say, so long as we can still power them and have the material to keep making them better, these same fears about AI and Robotics will continue!

No one can say what is to come in the future! but what we can do is deal with what the facts are today, and the current facts are that we simply are still so very far away from hand our social controls over to AI machines that so as such there is little to worry about!

NOW !!

What is AI?

One area covered very well in this documentary is data! DATA !!, what’s called ” BIG DATA!! ”

I very much get and like the points made during the film, that in reality computer software systems have actually developed less than we think they have, what has developed is the area of DATA volume and fast access methods. Today there is so much data existing and available to computer systems that it is truly amazing!

AI systems have grown out of this DATA! , they only in truth exist because the data is available to them and they can thus analyse and examine this data, learning basic facts from it and then perform computer-based operations as a result of predictions made from this data analysis.

An AI system is less about coded applications and more about data, for example, if somehow any original sourced data was lost along with the files used for future predictions based on the original data-sets then the AI system itself would be useless, it would be unable to do anything other than look around for new data-sets in-order to start its machine learning processes all over again. Its all about the DATA!

In the end, It is true to say that AI systems have more in relation to the world of statistics that they do with the world of pure computer coding.

So the main difference between an AI computer system and an old school computer system is as follows:

Old school computer systems had to be told by a programmer the defined set of parameters under-which they needed to operate in any single given condition and related application. These parameters of operation had to be pre-defined and given to the code, no learning process went on inside the code in order to define its own operating condition, this was a human job!

Today’s AI systems find out these operating parameters for themselves by first accessing all data they need, they then creating maths-based models from this data. These models are used in later related applications as a base-line, a basic scope of application parameters.

This learning stage of an AI system is the “Machine learning” stage, the process of learning from existing data, the areas that work best. I.E. what type of medication works best on different people or groups of people for any given condition.

At its root level, this is all that AI is doing, it is using existing results and pre-logged conditions to predict what best to do with future new data!

In a hospital environment, this is perfect! what Doctor has time to remember all the best options he or she has taken with their past actions?

With AI systems, massive amounts of historical data can be examined, filtered along with results data and reduced down into the form of predictions for future actions!

Of course! this process can be used for you or can be used against you! but is this not just like anything in life?

My own feeling is that if in the future if I need to visit a doctor I hope he or she will have access to data that is being used in the best way possible in order to help me get better as fast as possible!

As a final note : If personally you have a problem with AI systems such as Googles deep learning systems, using your data , then don’t give it to them !, you can go back to using printed material for help on subjects, visit your book shop !, use the high street and don’t order online, use cash when you do shop and keep your data yours !

I must admit I do have a big problem with all of my life and its actions being reduced to and referred to as data, I personally think this is the biggest problem and a very real one. It has nothing to do with “robots and the future” and more to do with peoples actual day to day living – now in 2019!

If any confidence trick is being played on us it’s the one of giving us something to worry about in twenty years time, so we think a little less about our human rights now! i.e. should all are movements and transactions be recorded and then used in order to predict our future actions? Really should they?

Posted in AI, Computer coding, IT skills, Nigel Borrington, Software | Tagged , , , , , , , | Leave a comment

Update and notes .. Developing an SQL database server/client system.

Odroid XU4q
A perfect thin-client

Its already been a couple of weeks since my last post, I had hoped to post more often in the last couple of days but putting the fine details for my SQL database project in place has taken a lot more of my free time than I hoped + I don’t want to post unless my post have tested and personally development details !

I do feel in a great position now however to again start to post here, posts that include some interesting tested results of system builds and software installations and configurations.

Most of my time in the last couple of weeks has been spent working one putting in place a networked group of small single board computers including – Asus Tinker boards an Odroid XU4q and a raspberry pi SQL-database server.

I have been working hard to establish both the best available hardware to use and the best operating systems.

These are the system configurations I have now selected

1.. A Raspberry Pi 3b+ installed in an (element 14) PI-Desktop case, with Ubuntu Mate 16.04-LTS and Postgresql 9.5 (SQL database server) installed. This system has been configured to allow for remote client connections.

2.. As client systems to the above, I have installed both a Asus Tinker board with Armbian OS ( based on Ubuntu 18.04-LTS) and an Odroid XU4q with Ubuntu 18.04-LTS.

3.. An Asus Tinker board with Android 9 installed- I want to test this operating system to see just how much SQL client software is available along with testing just how much Python programming using psycopg2 and Tkinter modules (detailed below!) can be used on an android system?, it could be that I need to uses JAVA on this system for software development ?

As said – as software selection, I have installed PostgresQL 9.5 as the SQL server software on a Raspberry Pi 3B+, I feel that despite the lower spec of the Raspberry PI to the other boards I have used, this system should be more stable (running at lower power ratings and thus temperatures), an SQL server will run without a screen and thus the need for any great graphics performance.

As for the client systems and software, The extra power provided by the Asus Tinker boards and Odroid Xu4q will provide more than enough processor and graphics power to run all needed database client software and development processes.

As a last note : The other two areas worked on in the last two week relate to Python development and the first review of both Kexi an SQL client application.

With Python I have now worked with both the pyscopg2 and the tkinter modules for both python 2 and 3.

Psycopy2, is the most popular python module used with the python development language used in order to open a connection to an SQL-Server and then provide all the required API commands used as an interfaces, to perform the full set of processes for SQL programming.

Tkinter, this modules added to python a full set of commands and API’s needed to create even the both powerful of modern GUI applications.

These modules combined provide for all the missing links in an up-to date database system, the ability for python to perform all the available SQL operations and then to present data and retrieve data from the user in the form of a GUI is indeed completing a puzzle that many find in-front of themselves when they first start coding.

There is a Question however that could be asked and that is – if with very powerful database application such as (Libreoffice-base, MS-Access and Kexi), do you actually need to write python code?

I hope to find the answer to this question over the coming weeks, just for starters however , you have to remember that many application allow you to add python scripts as additions, this would allow you to access the data-set you are working from your SQL-server and then update this data or store results from the same application back to the same database server data-sets.

Another good reason to use Python, would be in an environment where data is both being stored and retrieved from your SQL server automatically, such as a sensor based AI system on a factor floor !

Posted in computer fundamentals, Development board hardware, Development boards, Development Languages, IT skills, Linux, Odroid, Raspberry pi, Single board computers | Tagged , , , , , , , , | Leave a comment

Study and development plans 2019 ……

Computer blog – study and project development areas, June 2019

This post is a very personal one and in many ways just a note to myself !

It details all areas involved in my study and development projects from the Start of June 2019 going forward. The intention is to once again use my WordPress blog to map all study areas and detailed development projects.

Since I last posted here I have a good overall idea of the areas I both intend to continue studying and the IT projects I am working on.

These area include :

• Sourcing and detailing a study and development path for the rest of 2019
• Locating all required course material
• Locating, sourcing and installing all systems needed to help in the above areas
• The building of a study and development environment, including all needed hardware and software systems
• Define a study and development frame work
• Defining realistic time scales for all study and development projects
• Creating a method of reference for all course notes, so that a fast and useful means of study revision is possible (This blog and other methods).
• Creating and documenting all study projects, this includes sourcing data and any code examples needed to add useful additional examples and future projects, for use during related learning processes.

All the above bullet points will act as both an initial step and then an on-going frame works for both study and systems development, I feel it is important to create a working environment so that all future and ongoing areas can be fully recorded and thus easily retrieved when called upon.

Also since my last post here I have taken many more training courses and from them I feel found some new grounding, mainly in the areas of SQL data-base coding/managment and data analysis.

You can see from the above bubble chart, the initial stages of my plans for the remaining part of this year.

The main aim is to setup all needed systems to study the following areas :

• Statistics for Business analysis
• Database management systems
• Coding methods for Statistics, database managements and machine learning
• Application development using Python/R programming languages
• The creation of applications with user friendly GUI systems
• Existing Database/Statistical analysis based office applications (MS and Libre-office)
• Configuration of server/client based network systems, their installation and security

In many ways I am already a good distance down the path on all of these areas, my aim here in returning to my blog however is to begin the process of documenting all the areas that I have covered so far along with the new areas I continue to learn.

So here on WordPress I will create my documentation system. As I detailed above, I want to create a note taking and logging system that is super easy and fast to use in-order to retrieve details covering many areas.

All posts here will however also be created and stored off-line, having the same notes on and off line will however allow myself to access them in any place and time.

Many of these areas sound heavy and not much fun, however there are many areas here that will be, like installing and setup of multiple (single board computers) such as the new raspberry pi 4b announced only yesterday and when its available , most likely July, I will order one of them and use it a lot during 2019, hopefully showing just how it can be used for more than just games.

The Raspberry pi systems are perfect for things like VNP/WEB/SQL servers so I will be using one for just such areas.

Posted in Computer coding, Introduction, Operating system installation, Programming skills | Tagged , , , , , , , , | Leave a comment

New development projects for 2019 – SQL Data-base management, Psion Series 5 second life, Element 14 PiDesktop

I have three news Development projects and Study areas that I have been working on in January 2018 as follows:

Asus Tinker Board SQL Data base server.

Almost all computer based projects including those in the Makers community at some point need to (create , story and retrieve data), this data can be in the form of (configuration parameters, users/sensor input, log files and statistics analysis). This data can be stored locally within each application design, however there are some considerable advantages to storing all application data externally from application related data files and their constants and variables.

One clear advantage of this is that if you use an external data-base management system such as an SQL-server, your data and its structurer will both be available to any external application that wishes to use it. SQL servers are fully structured systems and document within themselves the structure of any database they contain and manage. So you can then use any available management tools (e.g. pgadmin3), of which there are many that relate to an SQL data-base management system, to view the structure of tables to include in your code.

The ability to analyses the data structures involved within applications is one of the biggest restrictions when in comes to extending or debugging applications , some of which may have been written many years before and where documentation may be poor or lost altogether. You can if permitted access and view the structure of data files from a good SQL managment tool within minutes and begin to design or debug your application within the hour.

Also as a rule a fully featured SQL server application also places your data behind a secure curtain along with providing fully secure backup and restore facilities, one of the issues with small scale SBC applications is that they are viewed mainly from a local system perspective, yet the data they produce can often be mission critical, as such all their data should be transfered to remote systems for the reasons of (security, analysis and backup).

Debian based Linux, the most popular distribution of Linux for the SBC(Single Board computer) maker market, including the ASUS Tinker board and the Raspberry Pi, have the ability to install versions of MYSQL and POSTGRESQL 9.6 or newer, so that you can store all your applications data locally on the same SBC (however as stated above this is not advisable). In my own project here I will make use of two ASUS Tinker boards, one acting as a client and the other as the SQL-server using TCP/IP based SQL drivers and coding applications in (C++ and/or Python) and using a client/server connection between the two systems. Constructing this Client/server model will show how its possible to connect any SBC based application into a much larger industrial based environment, such as in a factory setting where application data may need to be logged in order to provide control information and production reporting statistics.

In the bigger picture, I hope to use 2018 in order to update my SQL data based management skill, using this project as a starting point adding some new and up-to date qualifications including certificates in postgresQL and possibly MYSQL. My I.T. background is located firmly in this area having worked on IBM UNIX/LINUX and MS-Windows server installations for many years.

The other two projects I am currently working on are as follows :

Psion Series 5 – Second life Project

I have almost completed a project to give the 1990’s Psion series 5 and new life as a serial terminal within a SBC network, this is a great use for this old machine. The Series 5 from Psion is widely still held with respect within the Retro Hardware community. During my current projects with it I am amazed as to how usable I still fine this machine.

Way back in the late 1990’s Psion assembled a large team of designers and makers to get this product to market and its amazing that they completed the project within twelve months, whats even more amazing is that despite for one fault with the screen cable that even some twenty years on can be repaired and returned within two weeks, these machine are still working and stayed in great condition.

The Photo above is of the Ericsson version of the Psion 5MX, basically the same machine, with some stronger parts added and a small shift in the great set of applications installed on the ROM , including a full set of office based applications and more importantly for this project a full Programming language OPL used to transfer daat via a serial cable, along with a full VT100 serial terminal application allowing for a terminal into the BASH sheel, Amazing for 1999!.

This project added a text based terminal to a single board computer, allowing for such areas as (Shell terminal control, Text based monitoring, SQl text based command control, VIM editing, Python script running and editing, etc …..). Its worth noting that many Raspberry pi and SBC projects can involve running the PI from battery power , so can the Psion 5 system also work using two AA batteries that will last for some twenty + hours of constant use, providing for a great Raspbery pi companion!.

Raspberry PI Element 14 PIDesktop project

The third on going project I am working on is the creation of a Raspberry PI 3 desktop computer.

The Element 14 creation, the PiDestop is a late introduction to the Raspberry Pi extended product range , it includes one of the best cases every produced for this system , however this is not the most impressive feature!

This kit also includes a HAT board for the Raspbery Pi that includes an system on/off switch, a system battery (using a CR2032 ,3.0V,Lithium, 210 mAh) for the system clock backup and an interface for an SSD drive unto 1TB.

It is the ability to both boot an OS from and SSD drive and use the same drive for system storage that interested me the most about this project, upto the Raspberry Pi 3 all storage on the raspberry pi systems had to be limited to using an SD card, using an SSD drive however should increase available storage and speed up access times.

I will during a series of posts detail how to setup this system and make the best use of all the new features provided by the Element 14 product.

It also worth noting that this kit can be used with any SBC that has the same layout and GPIO pin configuration as the Raspberry PI 3 such as the ASUS tinker board and the Pine systems ROCK64 Boards.

Posted in Development board hardware, Development boards, Development Languages, Hardware construction, Linux, Nigel Borrington, Programming skills, Python, Second life Hardware, Study guides and exams, Uncategorized | Tagged , , , , , , , , , , , , , , , , , , , | Leave a comment

Linux Shell- command history

Linux Shell Command History

Linux Shell
Command History

NB : Please note that this post follows on from Linux Shell command tricks

The second of the tools available for the command line interface to a Linux shell is command History, Just like Command and file completion this set of tools provides the terminal user with a very fast method of command entry and processing.

Whenever a terminal users enters a command it is stored into a file within the users /home directory.

An example of the used file for a shell is:

For the BASH shell “/home/.bash_history”

Firstly as with many shell services it is worth noting that you can customise their configuration, for your own use if you so wish. The default setting are usually ok but if your a very heavy user such as a systems administrator however you may want to deviate somewhat from the norm/defaults.

An example of this is with the configuration of a shells history functions.

If you use the BASH shell, your main configuration file is /home/.bashrc and as default it contains the following lines for the bash history functions.

——————————————————————————-

/home/.bashrc

# don’t put duplicate lines or lines starting with space in the history.
# See bash(1) for more options
HISTCONTROL=ignoreboth

# append to the history file, don’t overwrite it
shopt -s histappend

# for setting history length see HISTSIZE and HISTFILESIZE in bash(1)
HISTSIZE=1000
HISTFILESIZE=2000

——————————————————————————-

You can take the following facts out of looking through these lines of code !!

1. By default lines that begin with spaces or are already to be found in /home/.bash_history, will not be written to the file.

2. By default all commands during every shell session with be added to the /home/.bash_history file, not just the commands entered during the current and thus this, shell session.

3.. There is a shell history command called “shopt” you can look up in the man pages, in order to understand how it can be used to configure the shells history functions.

4.. The two variable’s HISTSIZE and HISTFILESIZE exist in order to limit the number of individual commands stored and/or the total size of the /home/.bash_history file.

These configuration options can best be explained as follows along with other options not configured as default :

——————————————————————————-

Better shell history

By default, the Bash shell keeps the history of your most recent session in the .bash_history file, and the commands you’ve issued in your current session are also available with a history call. These defaults are useful for keeping track of what you’ve been up to in the shell on any given machine, but with disks much larger and faster than they were when Bash was designed, a little tweaking in your .bashrc file can record history more permanently, consistently, and usefully.
Append history instead of rewriting it

History append option

You should start by setting the histappend option, which will mean that when you close a session, your history will be appended to the .bash_history file rather than overwriting what’s in there.

shopt -s histappend

Allow a larger history file

The default maximum number of commands saved into the .bash_history file is a rather meager 500. If you want to keep history further back than a few weeks or so, you may as well bump this up by explicitly setting $HISTSIZE to a much larger number in your .bashrc. We can do the same thing with the $HISTFILESIZE variable.

HISTFILESIZE=1000000
HISTSIZE=1000000

The man page for Bash says that HISTFILESIZE can be unset to stop truncation entirely, but unfortunately this doesn’t work in .bashrc files due to the order in which variables are set; it’s therefore more straightforward to simply set it to a very large number.

If you’re on a machine with resource constraints, it might be a good idea to occasionally archive old .bash_history files to speed up login and reduce memory footprint.

Don’t store specific lines

You can prevent commands that start with a space from going into history by setting $HISTCONTROL to ignorespace. You can also ignore duplicate commands, for example repeated du calls to watch a file grow, by adding ignoredups. There’s a shorthand to set both in ignoreboth.

HISTCONTROL=ignoreboth

You might also want to remove the use of certain commands from your history, whether for privacy or readability reasons. This can be done with the $HISTIGNORE variable. It’s common to use this to exclude ls calls, job control builtins like bg and fg, and calls to history itself:

HISTIGNORE=’ls:bg:fg:history’

Record timestamps

If you set $HISTTIMEFORMAT to something useful, Bash will record the timestamp of each command in its history. In this variable you can specify the format in which you want this timestamp displayed when viewed with history. I find the full date and time to be useful, because it can be sorted easily and works well with tools like cut and awk.

HISTTIMEFORMAT=’%F %T ‘

Use one command per line

To make your .bash_history file a little easier to parse, you can force commands that you entered on more than one line to be adjusted to fit on only one with the cmdhist option:

shopt -s cmdhist

Store history immediately

By default, Bash only records a session to the .bash_history file on disk when the session terminates. This means that if you crash or your session terminates improperly, you lose the history up to that point. You can fix this by recording each line of history as you issue it, through the $PROMPT_COMMAND variable:

PROMPT_COMMAND=’history -a’

——————————————————————————-

Basic shell history usage

1.. Retrieving a command

The most basic way to retrieve a command from the history system is to use the UP arrow key on the Keyboard, doing so repeatedly will scroll back through your command history until you reach the wanted command. If you go past the wanted command just press the down key !

The Ctrl+P and Ctrl+N keys perform the same function respectfully

Search history for a command

The above method works well if your wanted command was entered into history with-in the last few commands but not so well if it was entered a few days or weeks ago!

In order to retrieve older commands you can search for them in the history system as follows:

By pressing Ctrl+R and typing a few characters of the command you want, you will be able to search back through the shells command history. The characters should build up to form a unique part of the command, they need not be at the start of the command but can form any part of it, i.e. a file name or ip address. If you cannot enter a unique part of a command then by pressing Ctrl+R again you will be able to scroll through all commands that do contain the characters you have entered for the search.

NB : Ctrl-S performs a forward search if you find yourself anywhere before the end of the history file, having already performed a search with Ctrl-R for example. On some systems Ctrl-S my hang the terminal , by pressing Ctrl+Q you will free up the terminal again, the command “stty -ixon” should prevent this hanging from taking place again.

Command editor

When you have retrieved a command from history, just like when you are entering a command for the first time, you will without even realising it be using the keyboard instructions and command sets from one of two possible text editors (EMACS or VI), most Linux distributions use EMACS as default but you can change to VI/VIM and back again as follows !

enter “set -o vi” or “set -o emacs ” from the terminal prompt , you can also enter this command into you users profile configuration file /home/.profile.

NB : You can find many web pages that detail the syntax of both editors and will need to know this syntax to pass these Linux exams.

history command

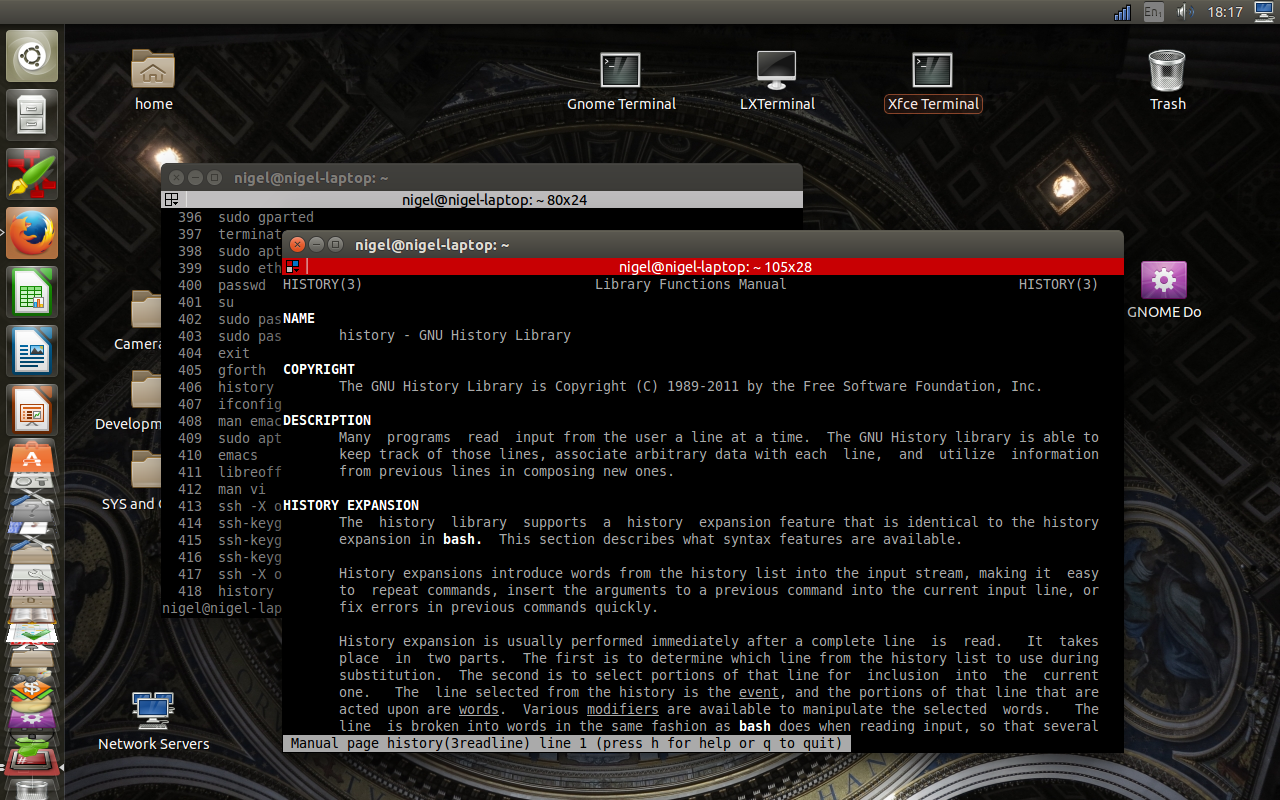
by typing “history” at the command prompt, you will see a full list of all your history file commands along this their reference number.

i.e. 419 ls -al ./.h*

The following command short cuts can be used quickly, to both retrieve a command using its Ref number or retrieve the very last command in the history file as a reference point.

!! = Retrieve and execute the very last command
!(x) = Retrieve and execute the command with Ref number(x)
!-(x) = Retrieve and execute the command at the (final history ref number (x) – (x)

Clearing your command shell history

To clear you command history execute the following command

history -c

——————————————————————————-

Bash history expansion

Setting the Bash option histexpand allows some convenient typing shortcuts using Bash history expansion. The option can be set with either of these:

$ set -H
$ set -o histexpand

It’s likely that this option is already set for all interactive shells, as it’s on by default. The manual, man bash, describes these features as follows:

-H Enable ! style history substitution. This option is on
by default when the shell is interactive.

You may have come across this before, perhaps to your annoyance, in the following error message that comes up whenever ! is used in a double-quoted string, or without being escaped with a backslash:

$ echo “Hi, this is Tom!”
bash: !”: event not found

If you don’t want the feature and thereby make ! into a normal character, it can be disabled with either of these:

$ set +H
$ set +o histexpand

History expansion is actually a very old feature of shells, having been available in csh before Bash usage became common.

This article is a good followup to Better Bash history, which among other things explains how to include dates and times in history output, as these examples do.

Basic history expansion

Perhaps the best known and most useful of these expansions is using !! to refer to the previous command. This allows repeating commands quickly, perhaps to monitor the progress of a long process, such as disk space being freed while deleting a large file:

$ rm big_file &
[1] 23608
$ du -sh .
3.9G .
$ !!
du -sh .
3.3G .

It can also be useful to specify the full filesystem path to programs that aren’t in your $PATH:

$ hdparm
-bash: hdparm: command not found
$ /sbin/!!
/sbin/hdparm

In each case, note that the command itself is printed as expanded, and then run to print the output on the following line.
History by absolute index

However, !! is actually a specific example of a more general form of history expansion. For example, you can supply the history item number of a specific command to repeat it, after looking it up with history:

$ history | grep expand
3951 2012-08-16 15:58:53 set -o histexpand
$ !3951
set -o histexpand

You needn’t enter the !3951 on a line by itself; it can be included as any part of the command, for example to add a prefix like sudo:

$ sudo !3850

If you include the escape string \! as part of your Bash prompt, you can include the current command number in the prompt before the command, making repeating commands by index a lot easier as long as they’re still visible on the screen.
History by relative index

It’s also possible to refer to commands relative to the current command. To subtitute the second-to-last command, we can type !-2. For example, to check whether truncating a file with sed worked correctly:

$ wc -l bigfile.txt
267 bigfile.txt
$ printf ‘%s\n’ ’11,$d’ w | ed -s bigfile.txt
$ !-2
wc -l bigfile.txt
10 bigfile.txt

This works further back into history, with !-3, !-4, and so on.
Expanding for historical arguments

In each of the above cases, we’re substituting for the whole command line. There are also ways to get specific tokens, or words, from the command if we want that. To get the first argument of a particular command in the history, use the !^ token:

$ touch a.txt b.txt c.txt
$ ls !^
ls a.txt
a.txt

To get the last argument, add !$:

$ touch a.txt b.txt c.txt
$ ls !$
ls c.txt
c.txt

To get all arguments (but not the command itself), use !*:

$ touch a.txt b.txt c.txt
$ ls !*
ls a.txt b.txt c.txt
a.txt b.txt c.txt

This last one is particularly handy when performing several operations on a group of files; we could run du and wc over them to get their size and character count, and then perhaps decide to delete them based on the output:

$ du a.txt b.txt c.txt
4164 a.txt
5184 b.txt
8356 c.txt
$ wc !*
wc a.txt b.txt c.txt
16689 94038 4250112 a.txt
20749 117100 5294592 b.txt
33190 188557 8539136 c.txt
70628 399695 18083840 total
$ rm !*
rm a.txt b.txt c.txt

These work not just for the preceding command in history, but also absolute and relative command numbers:

$ history 3
3989 2012-08-16 16:30:59 wc -l b.txt
3990 2012-08-16 16:31:05 du -sh c.txt
3991 2012-08-16 16:31:12 history 3
$ echo !3989^
echo -l
-l
$ echo !3990$
echo c.txt
c.txt
$ echo !-1*
echo c.txt
c.txt

More generally, you can use the syntax !n:w to refer to any specific argument in a history item by number. In this case, the first word, usually a command or builtin, is word 0:

$ history | grep bash
4073 2012-08-16 20:24:53 man bash
$ !4073:0
man
What manual page do you want?
$ !4073:1
bash

You can even select ranges of words by separating their indices with a hyphen:

$ history | grep apt-get
3663 2012-08-15 17:01:30 sudo apt-get install gnome
$ !3663:0-1 purge !3663:3
sudo apt-get purge gnome

You can include ^ and $ as start and endpoints for these ranges, too. 3* is a shorthand for 3-$, meaning “all arguments from the third to the last.”
Expanding history by string

You can also refer to a previous command in the history that starts with a specific string with the syntax !string:

$ !echo
echo c.txt
c.txt
$ !history
history 3
4011 2012-08-16 16:38:28 rm a.txt b.txt c.txt
4012 2012-08-16 16:42:48 echo c.txt
4013 2012-08-16 16:42:51 history 3

If you want to match any part of the command line, not just the start, you can use !?string?:

$ !?bash?
man bash

Be careful when using these, if you use them at all. By default it will run the most recent command matching the string immediately, with no prompting, so it might be a problem if it doesn’t match the command you expect.
Checking history expansions before running

If you’re paranoid about this, Bash allows you to audit the command as expanded before you enter it, with the histverify option:

$ shopt -s histverify
$ !rm
$ rm a.txt b.txt c.txt

This option works for any history expansion, and may be a good choice for more cautious administrators. It’s a good thing to add to one’s .bashrc if so.

If you don’t need this set all the time, but you do have reservations at some point about running a history command, you can arrange to print the command without running it by adding a :p suffix:

$ !rm:p
rm important-file

In this instance, the command was expanded, but thankfully not actually run.
Substituting strings in history expansions

To get really in-depth, you can also perform substitutions on arbitrary commands from the history with !!:gs/pattern/replacement/. This is getting pretty baroque even for Bash, but it’s possible you may find it useful at some point:

$ !!:gs/txt/mp3/
rm a.mp3 b.mp3 c.mp3

If you only want to replace the first occurrence, you can omit the g:

$ !!:s/txt/mp3/
rm a.mp3 b.txt c.txt

Stripping leading directories or trailing files

If you want to chop a filename off a long argument to work with the directory, you can do this by adding an :h suffix, kind of like a dirname call in Perl:

$ du -sh /home/tom/work/doc.txt
$ cd !$:h
cd /home/tom/work

To do the opposite, like a basename call in Perl, use :t:

$ ls /home/tom/work/doc.txt
$ document=!$:t
document=doc.txt

Stripping extensions or base names

A bit more esoteric, but still possibly useful; to strip a file’s extension, use :r:

$ vi /home/tom/work/doc.txt
$ stripext=!$:r
stripext=/home/tom/work/doc

To do the opposite, to get only the extension, use :e:

$ vi /home/tom/work/doc.txt
$ extonly=!$:e
extonly=.txt

Quoting history

If you’re performing substitution not to execute a command or fragment but to use it as a string, it’s likely you’ll want to quote it. For example, if you’ve just found through experiment and trial and error an ideal ffmpeg command line to accomplish some task, you might want to save it for later use by writing it to a script:

$ ffmpeg -f alsa -ac 2 -i hw:0,0 -f x11grab -r 30 -s 1600×900 \
> -i :0.0+1600,0 -acodec pcm_s16le -vcodec libx264 -preset ultrafast \
> -crf 0 -threads 0 “$(date +%Y%m%d%H%M%S)”.mkv

To make sure all the escaping is done correctly, you can write the command into the file with the :q modifier:

$ echo ‘#!/usr/bin/env bash’ >ffmpeg.sh
$ echo !ffmpeg:q >>ffmpeg.sh

In this case, this will prevent Bash from executing the command expansion “$(date … )”, instead writing it literally to the file as desired. If you build a lot of complex commands interactively that you later write to scripts once completed, this feature is really helpful and saves a lot of cutting and pasting.

————————————————-

History security footnote !!

Most likely system security should not be as a foot-note! but the following is a very important detail !!

Never enter passwords on the command line, as part of a command. Some shell commands allow you to do so but note that they will store these passwords into the history file as ascii text, so anyone who has access to your history file can see your passwords !!.

Many commands will prompt you for a password, if they need one to function, the password you enter in this way is never stored in your history file, so if you can always operate in this mode of security !!!

If you absolutely need to give your password as part of a command, then clear your history after you enter the command as follows:

history -c # clear your command history !

Posted in IT skills, Linux, Operating systems, Study guides and exams | Tagged , , , , , , , , , | Leave a comment

Linux Shell command tricks – Command completion

Linux shell Command tricks

Linux shell
Command tricks

The power of the command line in Linux Distributions is still very much at the forefront, many admin task can simply be performed much more efficiently this way.

This faster command entry speed, for admin tasks is true even by using the basic terminal but many of the most up-to date command shells such as (bash, ksh and zsh) provide powerful tools that can be used to speed up shell command entry and processing even more.

The tools available fall into the following areas :

1.. Command and File-Path/File-name completion
2.. Command History
3.. Command line editing using Emacs or Vim

NB: in this post I will detail command completion, areas 2 and 3 above I will given their own posts.

Command and path/file-name completion

Completion Tools assist the user in typing commands at the command line, by looking for and suggesting matching words for incomplete ones. Completion is generally requested by pressing the completion key (often the Tab ↹ key).

Completion works by allowing you to enter only part of the text you need to complete a full command element, after you enter part of the text (Command or filename etc…) you press the TAB key, the shell then try’s to complete the rest of the element for you and adds one following space.

If only one possible command or file-name etc.. exists then the shell will complete this part/element of the command for you.

If more than one possibility exists then the shell will fill in what it can, it will then automatically show you all the possibilities or expect you to press the TAB key again for these options to be shown, depending on the shell you are using.

The concept of command line completion is very powerful and well worth learning, in order to speed-up command entry, it relates to the following areas when a shell command is being constructed:

Command name completion
Path and filename completion
Wildcard completion
Variable completion
Command argument completion

These areas are detailed as below :


Command name completion
is the completion of the name of a command. In most shells, a command can be a program in the command path (usually $PATH), a builtin command, a function or alias.

Path/filename completion is the completion of the path to a file, relative or absolute.

Wildcard completion is a generalization of path completion, where an expression matches any number of files, using any supported syntax for file matching.

Variable completion is the completion of the name of a variable name (environment variable or shell variable). Bash, zsh, and fish have completion for all variable names. PowerShell has completions for environment variable names, shell variable names and – from within user-defined functions – parameter names.

Command argument completion is the completion of a specific command’s arguments. There are two types of arguments, named and positional: Named arguments, often called options, are identified by their name or letter preceding a value, whereas positional arguments consist only of the value. Some shells allow completion of argument names, but few support completing values.

The Tab Key then is the method by which you use the completion shell tool/service to speed up the entry of almost all elements of a command.

Wiki Ref : Command-line completion

Posted in computer fundamentals, IT skills, Linux, Operating systems | Tagged , , , , , , , | Leave a comment

Linux OS and GPIO managment

Linux GPIO control

Linux GPIO control

Please note that this post follows on from : GPIO Part 1 :ARM Development boards and their low-level coding Data-sheets

This post is part 2 of A Look at how development boards such as the Raspberry PI allow a developer to code applications that control external hardware, through the systems GPIO header ports using the built in GPIO cpu interfaces, included on many ARM “SOC” CPU’s.

Different versions of the Linux Operating system are configured to control the GPIO ports, via device interfaces controlled within the system Kernel. The operating system itself can be used via shell scripts to control the status of the GPIO input and output pins.

GPIO enabled versions of Linux for the Raspberry Pi and other boards such as the Radxa rock and Odroid, use a device file structure in the /sys/…. file systems to pass read and write (input and output) signals to the kernels GPIO virtual devices, shell commands can be designed within a shell script.

Different versions of Linux for different development boards, have differences in how they are configured but the effects of the coding outcome are identical !

The two below screen shots are from a Raspberry-Pi 3 and then from an Odroid U2 board.

/sys/class/gpio on a raspberry pi 3

/sys/class/gpio on a raspberry pi 3

/sys/class/gpio folder in an Odroid U2

/sys/class/gpio folder in an Odroid U2

You can clearly see that the folder on the ODROID system contains a lot more GPIO device folders as default, on the Raspberry pi it is not until you enable I/O on a GPIO pin number that the folder for that pin number is created and then deleted again once the pin is disabled.

The following is an example BASH shell script used to control GPIO pin Num 4 as output and Num 7 as Input.

I have added comments to this script so that you can follow the processes it is performing.

————————————————————-

#!/bin/sh

# GPIO numbers should be from this list
# 0, 1, 4, 7, 8, 9, 10, 11, 14, 15, 17, 18, 21, 22, 23, 24, 25

# Note that the GPIO numbers that you program here refer to the pins
# of the BCM2835 and *not* the numbers on the pin header.
# So, if you want to activate GPIO7 on the header you should be
# using GPIO4 in this script. Likewise if you want to activate GPIO0
# on the header you should be using GPIO17 here.

#
# The file /sys/class/gpio/export is used to define which GPIO pins are enabled,
# likewise the file /sys/class/gpio/unexport is used to disable these pins again.
#
# In order to define the direction a GPIO pin is going to be used for
# (Input or Output) you echo “out” or “in” to a file created in the GPIO pins
# folder named “direction”.
#
#
# Set up GPIO 4 and set to output
#
echo “4” > /sys/class/gpio/export
echo “out” > /sys/class/gpio/gpio4/direction

# Set up GPIO 7 and set to input
#
echo “7” > /sys/class/gpio/export
echo “in” > /sys/class/gpio/gpio7/direction

# In order to Write output or turn on the GPIO pin you
# echo a “1” to the file /sys/class/gpio/gpio(X)/value
#
echo “1” > /sys/class/gpio/gpio4/value

# In order to read input or a signal from a GPIO pin you
# cat /sys/class/gpio/gpio(X)/value to the screen or to
# a shell variable to tested later.
#
cat /sys/class/gpio/gpio7/value

# It is important to clean up the status of the pins
# as you do not want to leave pins active with a positive current !
#
echo “4” > /sys/class/gpio/unexport
echo “7” > /sys/class/gpio/unexport

————————————————————-

NB : As you can see from the GPIO folders listings above the file owner in many installations is ROOT/SU, so in many cases you will have to use the following methods to perform the above operations.

echo “1” |sudo tee /sys/class/gpio/export

sudo sh -c ‘echo “1” > /sys/class/gpio/export’

Both methods work, the other option is to take ownership of the objects within the /sys/class/gpio folder, this however will not work on many systems as the folders are created and removed, with root permissions during the script processing, thus setting permissions before execution is not possible.

As a final note in this post, you should be aware that using Shell scripts at OS level like the one above, is the method selected by programming languages that do not have the ability to address GPIO control themselves. So long as these languages can call external OS shell scripts, then they can still be utilised to control external hardware.

———————————-

The following posts that relate to GPIO coding will cover the following areas.

I want to construct a full review (that will involve more than one post!) of all available GPIO enabled programming languages starting with Python and followed by languages such as C++ and Java. I have found in the Radxa rock and some Raspberry Pi documentation that included coding examples, only involve – as I said above, opening and closing the related operating system files. To do this is most likely very slow and inefficient and also has the drawback of not producing stand-alone code. While this kind of code is more than ok for testing purposes ! why not work with the final aim of your code being fast and also having the ability to run itself in such away that it can be loaded in any environment with or without needing a particular OS or even one at all !!

Posted in computer fundamentals, Cubietruck, Linux, Odroid, Operating systems, Programming skills, Radxa rock, Raspberry pi, Single board computers, Software skills | Tagged , , , , , , , , , | Leave a comment

Looking at shells, internal and External commands

Linux's Internal and External Shell commands

Linux’s Internal and External Shell commands

This Study area follows on from this Post , Using Linux Shells

Each of the available command shells in Linux has two primary types of commands, Internal or External.

Internal

By saying a command is Internal, these commands are fully incorporated with in the coding of the shell itself. Each Shell such as (BASH, DASH, KSH and ZSH) offer very similar commands but some also offer unique commands.

You can see a list of a shells internal commands by using the man pages that relate to the shell, i.e. “man bash” or “man ksh”. The text that relates to the internal command set is located under the heading of “Built-in commands”.

The Shell BASH uses the “help” command to show you details that relate to its internal command set:

Bash Help page "$ help"

Bash Help page “$ help”

External

These commands are installed within your Linux Installation, externally of a shell’s own coding.

The main reason for installing external shell commands is to add flexibility to a Linux installation and to allow for command compatibility with existing software.

It should also be noted that external commands are also shared between different shells thus removing object redundancy, the ideal is that only commands that reflect on core differences and performance between shells should be internal to the shell.

The removal of object redundancy both saves disk space and the chance of programming errors.

Determining a commands type

You can use many different methods to determine if a command is internal or external to the shells core, starting with the most effective method as follows :

The type command (Internal and External)

e.g.

$ type pwd
pwd is a shell builtin

the “type” command will return “command(x) is a shell command” if the given command is built into the shell and thus an internal command !

This answer however is not usually enough to help you know the full picture relating to any given command.

It is not unusual that a shell command exist in both internal and external forms, this can be because a (newer, more informative or more compatible) version has been installed into your core system.

To show just how many versions of a single command exist you can add the “-a” option as follows :

$ type -a pwd
pwd is a shell builtin
pwd is /bin/pwd

This use of the type command returns two lines, thus reporting that the command has found two existences of the pwd command.

Other methods of finding a command type (Internal or External) is to use the “which” command or the “whereis” command , these commands will however only confirm if a command is external and if so show its location.

You can also check the reference to “Built-in commands” within the selected shells man pages.

As said above bash also uses the “help” command to list all internal commands and there command line options, if your needed command is not listed here yet exists on the system then it is an external command usually located within your users default path.


Command order of execution and the $PATH environmental variable

When a command exists as both an internal and external command , it is the internal command that takes precedence, if you need to call the external command you need to include its full path when naming it on the command line or in a program or script.

i.e.

>$ type -a time
time is a shell keyword
time is /usr/bin/time

>$ time , # entered on the command line will call the shell’s internal command

>$ /usr/bin/time # explicitly names time as /usr/bin/time

When a command is only installed as an external command and it is called from the command line or in a program/script, it is the users PATH that is searched to locate the external command. Clearly this then requires that the location of the external command is added into your user $PATH environmental variable, it is this variable that is used during any of your operations to find objects you call for execution or files that your operations require.

you can check if an objects location is in your $PATH as follows

>$ which vim
/usr/bin/vim

>$ echo $PATH
/usr/local/sbin:/usr/local/bin:/usr/sbin:/usr/bin:/sbin:/bin:/usr/games:/usr/local/games

from the above you can see that the text editor “vim” exists in /usr/bin/ and that you $PATH env variable does have this folder location added correctly to it.

NB: You can add a directory path to $PATH variable.Run the below commands on terminal to add a directory path to the PATH-Variable,

su root
PATH=$PATH:/path/to/the/directory

To add the path permanently to the BASH shell environment, add the following line at the end of ~/.bashrcfile

sudo gedit ~/.bashrc

Add the below line at the end,

export PATH=$PATH:/path/to/the/directory

Posted in Linux, Operating systems | Tagged , , , , , , | Leave a comment

Using Linux Shells, Command entry and Terminal emulators.

Linux Terminal Emulators

Linux Terminal Emulators

Please note that this post follows on from : The Linux Shell

Operating systems such as Linux and Microsoft windows owe their current existence to much earlier versions of themselves with ASCII-code Text based command lines as their only interface with their users.

Linux as an operating system, owes a great deal to Unix, with its user interface operating from physical ASCII code serial-connection terminals. The then following X-windows originated at the Massachusetts Institute of Technology (MIT) in 1984, it provided a basic framework for a GUI environment: drawing and moving windows on the display device and interacting with a mouse and keyboard. At its start X-windows was not seen as vital in order to operate a Unix based system, as such X was viewed as a Utility application and X applications as alternatives only, to text based programs.

In the same fashion but a little later, Microsoft Windows history began with MS-DOS followed by Windows 1, on November 20, 1985. This version of Windows like X-Windows was viewed by most as a utility application only and distributed by Microsoft as such, most users stayed with MS-DOS for a considerable time.

You can see from the two images here, just how close the early versions of both operating systems GUI’s are.

VT220_Unix

Over the Years Microsoft has done its best to offer users a Windows GUI interface only, trying to move people away from any text based commands. This however has not always gone down well, take windows 8 for example!, many felt it a step to far and Windows 10 has now move back towards at least giving the user a little more control.

For a desktop application user, having a Windows GUI environment only is ok, however for more advanced users of MS-Windows who deal with many thousands of files and vast amounts of data, it is almost impossible to control their systems.

X-Windows 1984

X-Windows 1984

In order to help these power users, Microsoft offers their Power-shell application, which in effect offers its user a more advanced MS-DOS command like experience and allows systems administrators to construct scripts, used to control system settings and file manipulation in an advanced and time saving way.

MS Windows 1 and 2

Version 1 of MS Windows

Back In the world of Linux and to some extent MAC-OS and Android, the command shell has very much stayed at the front of these operating systems. As covered in my posts on “Linux and Unix commands shells” you can see that shells such as KSH and BASH have been around for a long time and are still both actively updated and supported.

Linux shells are ingrained into every area of a Linux installation, they sit at two levels (Systems shells and user shells), operating from file management to user management, file and system security. There is little dispute that this fact alone keeps a Linux based system free of Viruses, unlike MS-Windows.

MS-Windows needs expensive and resource hungry applications as additional products, in order to achieve the same level of security based operations that Linux is doing natively with every single task.

Using a Linux Shell

Screenshot from 2016-05-01 15:21:04

There are three fundamental ways that a user can make use of any one of the many available Linux command shells :

1.. By logging into a system that is configured to offer the user a text based terminal at first point of contact, with or without the ability to then open a Graphical X-Windows based environment. Some distributions of Linux such as Arch-Linux are configured in such away when first installed, it is up to the users to add a GUI environment post installation.

2.. By login into a Linux machine remotely with basic TCP/IP network services such as SSH or FTP you will be presented with a command shell terminal environment.

3.. By executing what is referred to as a Terminal emulator application, “Emulator” because this type of application acts in nature as a pipe between the lower level shell and a graphical user environment and thus emulates a more native command line ASCII terminal interface.

It should be noted that with both of the above methods of interacting with a Linux shell, the shell that you will be presented with as default, is the one defined by the settings that are held within your user account details.

With the first method ( ASCII text based ) of shell interaction you have few choice’s when it comes to how your interface is configured. For command entry, you can configure such things as the type of text editor that you are working with (i.e. VIM or Emacs). Choosing one over the other effects such things as the methods used to recall previous commands and the movement of the cursor with control codes. Digging deep when it comes to this subject is well worth the effort as a full understanding of command entry, such as command completion will help you fly through tasks that otherwise could take a considerable duration.

The terminal emulator form of contact with your chosen Linux shell is a lot more exciting and fulfilling.

Most Linux Distributions come pre-installed with a terminal emulator, these are usually related to the type of Graphical desktop environment, that your user account has defined as a default, (i.e. GNOME or LXDE).

You can also install a different Terminal emulator from a Linux repository, finding these applications is also possible by using a package manager such as Synaptic or Yum or even the Ubuntu Linux software centre.

Example terminal emulators for Linux shells

terminatorlogwatching
Terminator

More examples to look up and review for yourself before installing are( rxvt-unicode, Guake, Gnome Terminal, konsole, Pantheon Terminal, Terminology and Terminix).

My personal favourite Terminal emulator is, Terminator – as it Supports multiple terminal windows and is very user friendly and Highly customizable.

Posted in computer fundamentals, Linux, Operating system installation, Operating systems, Study guides and exams, Windows 10 | Tagged , , , , , , , , | Leave a comment